> For the complete documentation index, see [llms.txt](https://docs.snackprompt.com/llms.txt). Markdown versions of documentation pages are available by appending `.md` to page URLs; this page is available as [Markdown](https://docs.snackprompt.com/next-steps/workflows-webhooks.md).
# Workflows & Webhooks
Advanced guide on how to connect Snack Prompt to external tools via Webhooks and create intelligent workflows.
Let's start by explaining what a workflow is.
### What is a Workflow?
A workflow is the structured path a task follows from draft to completion. It defines who does what, in which order, and what criteria must be met to move to the next phase.
#### Components of a Workflow:
* Input: The starting point (e.g., an image request from a client).
* Steps: The actions performed (e.g., creating the prompt, generating the image, reviewing quality).
* Decision Points: Moments where the flow can take different paths (e.g., "Is the image good? If yes, send; if no, redo").
* Output: The final delivered result.
{% hint style="info" %}
An efficient workflow turns chaotic tasks into predictable and scalable processes.
{% endhint %}
###
Where can I find workflows in Snack Prompt?
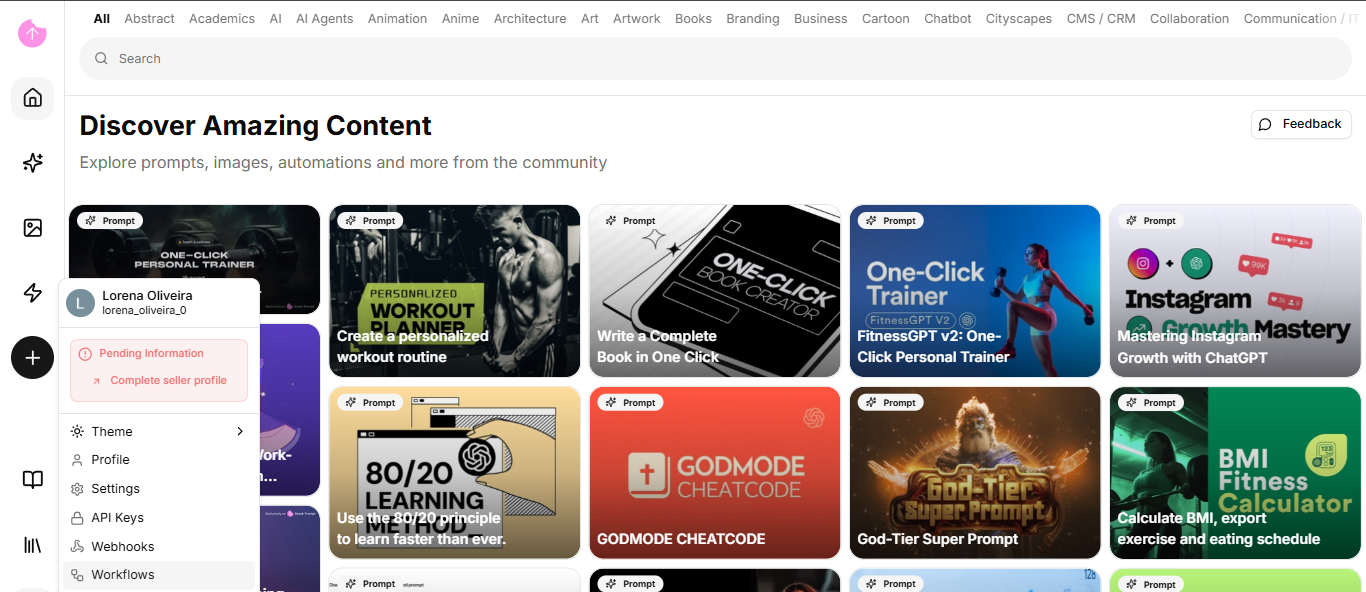
In the Snack Prompt on your left sidebar, clicking on your profile picture will give you two options: workflows and webhooks. Let's select the workflow option first.
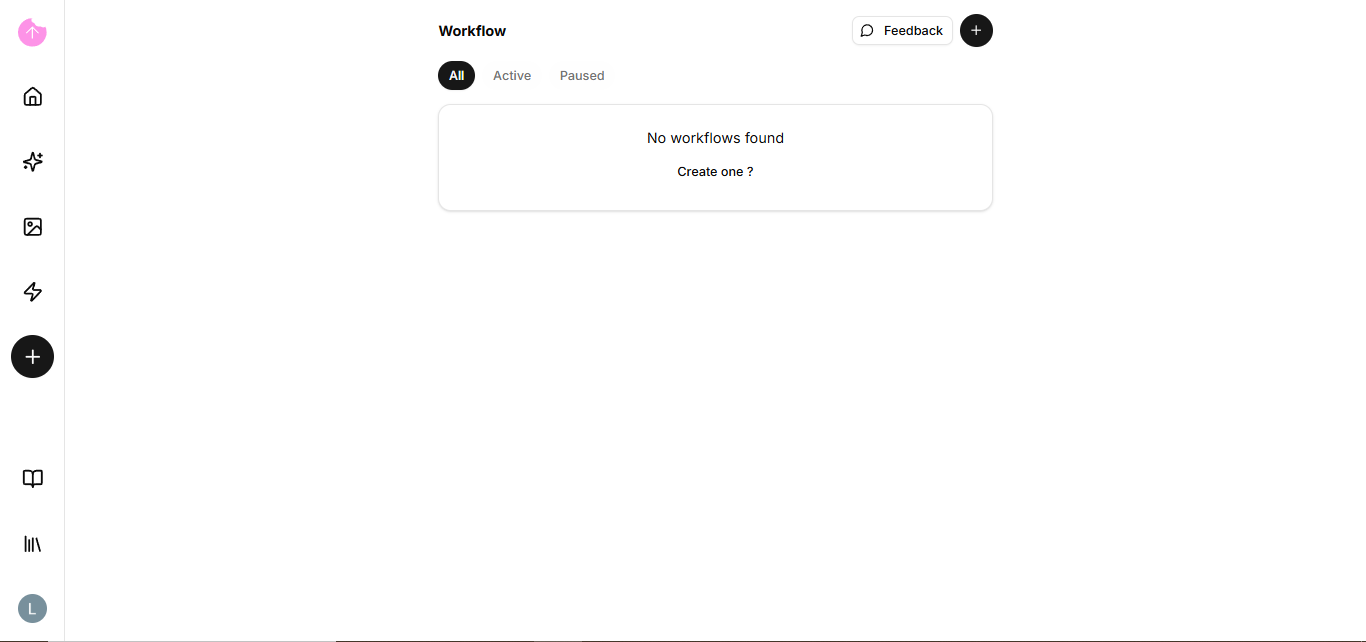
If you don't have any workflows, you can click on the "create one" option or the + if you already have one.
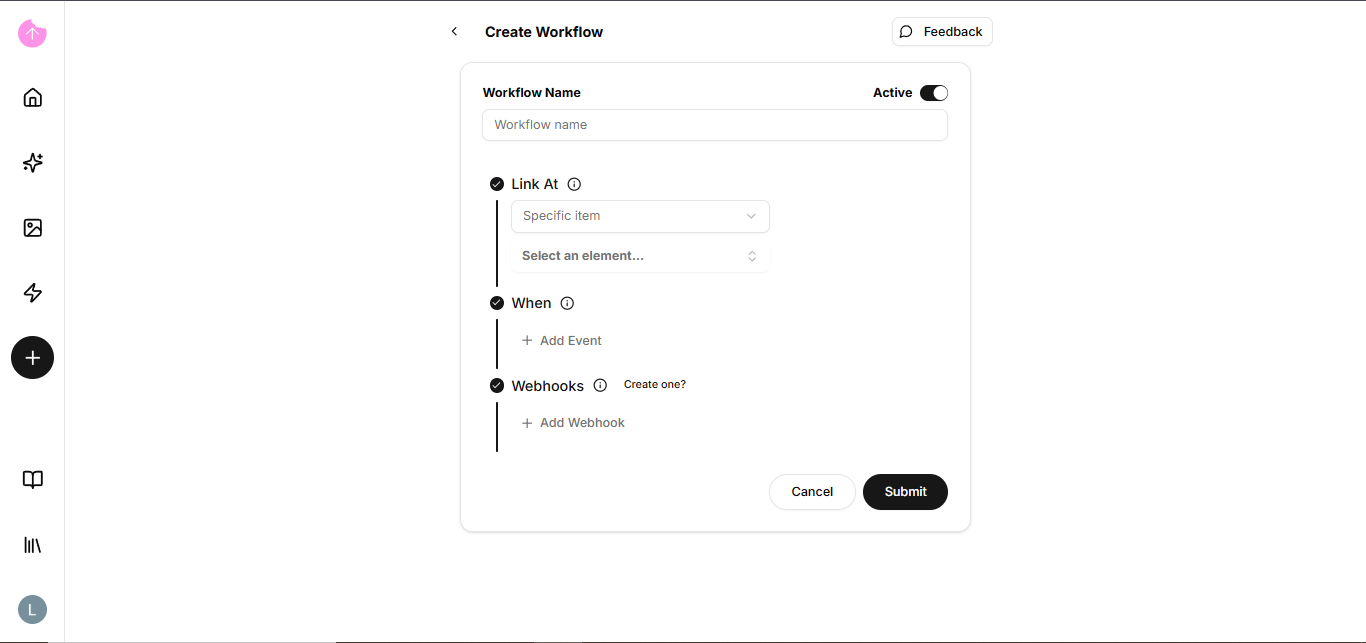
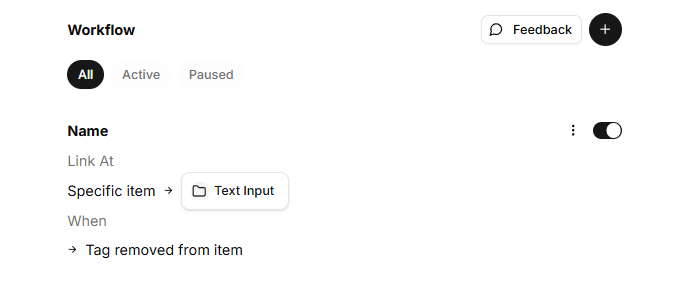
When you open the creation screen, you will have some options. Let's fill them in.
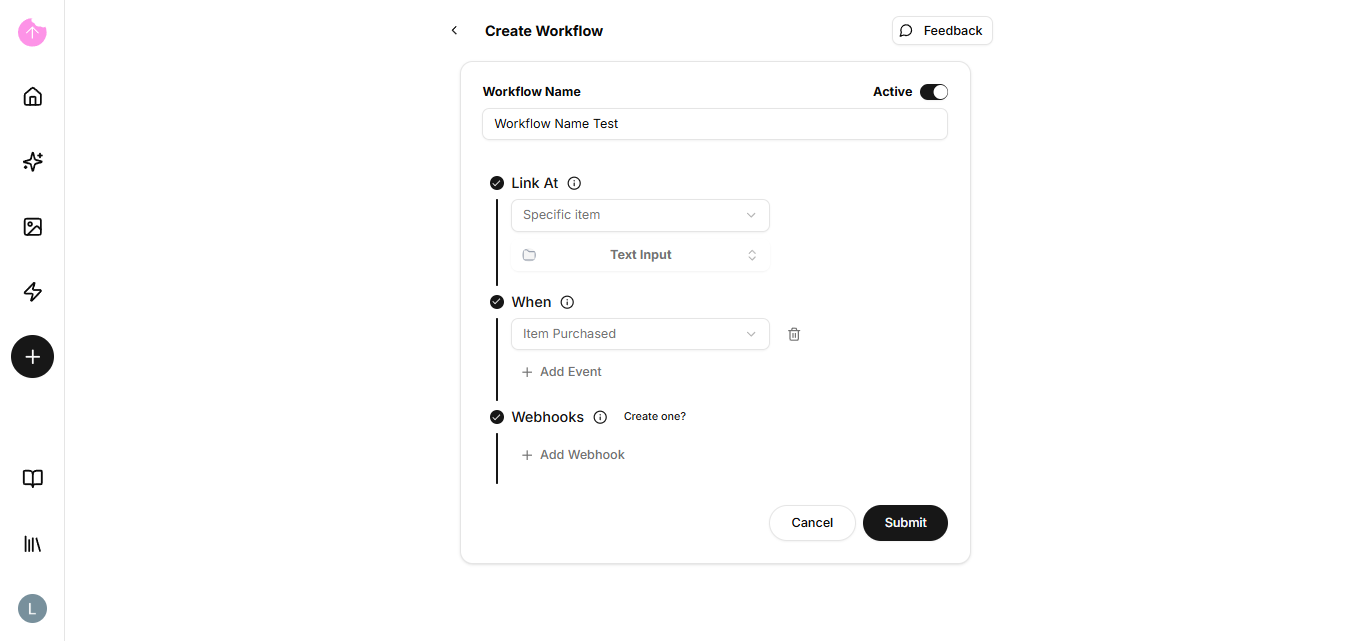
I filled in the first three fields: the name, which item I would like to trigger the workflow, and when the workflow should be activated.
In the last option, you will specify which webhook you would like to activate via the workflow.
If you already have a webhook, simply select it (+ Add Webhook) and press the submit button. The workflow is already activated by default, but you can deactivate it.
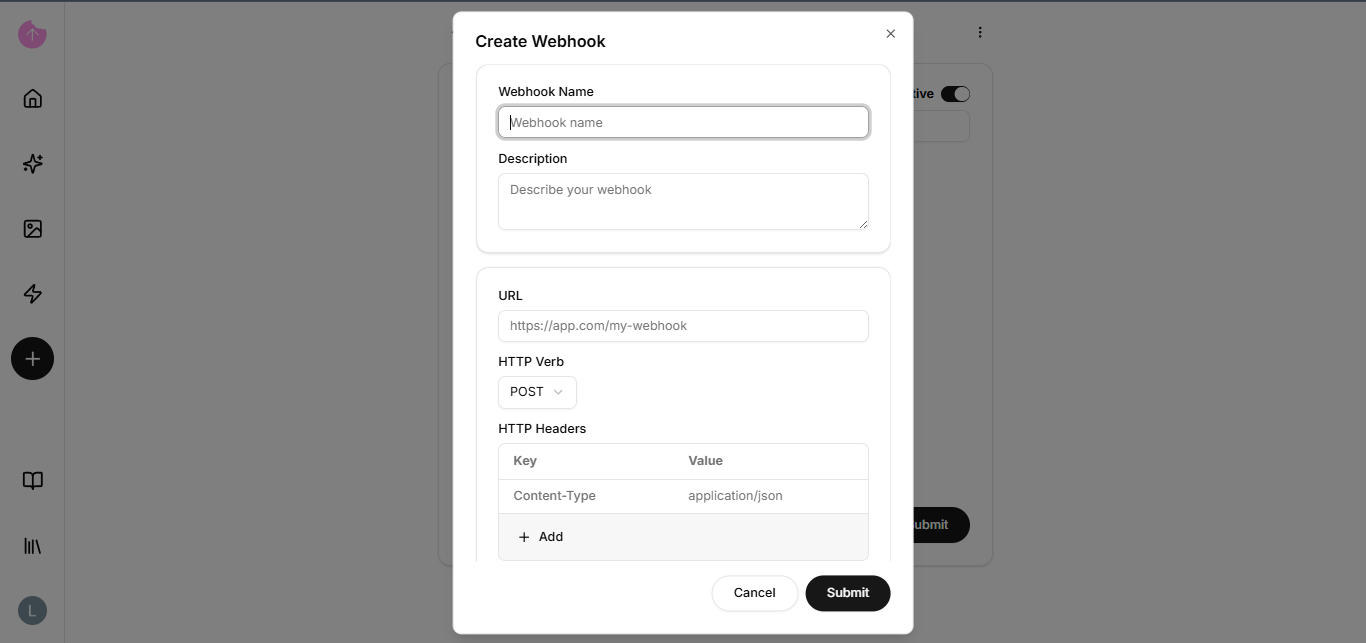
If you don't have a webhook, click on "create one" and another screen will open for you to fill it out.
But before filling it out, I'll explain what a webhook is and why I need it in a workflow.
### What is a Webhook?
A Webhook is an event-based communication mechanism between applications. Instead of one system constantly asking "is there anything new?" (which is called *Polling*), the Webhook sends the information instantly as soon as the event occurs.
#### Why do you need it in a Workflow?
1. Real-Time Speed: The moment a form is submitted or a payment is approved, the Webhook "pushes" the data to your workflow without delay.
2. Resource Efficiency: It saves processing power and battery, as the workflow is only activated when there is actual work to be done.
3. Connecting Different Apps: It is the universal language that allows tools without native integrations to talk to each other.
#### Practical Example:
Without Webhook: Your automation checks email every 15 minutes to see if an order has arrived.
With Webhook: The sales website "notifies" your automation the exact second the sale is made.
{% hint style="info" %}
Think of a Webhook as an "intercom": you only go to the door when it rings, instead of constantly checking the sidewalk to see if someone is there.
{% endhint %}
### So how do I create a webhook?
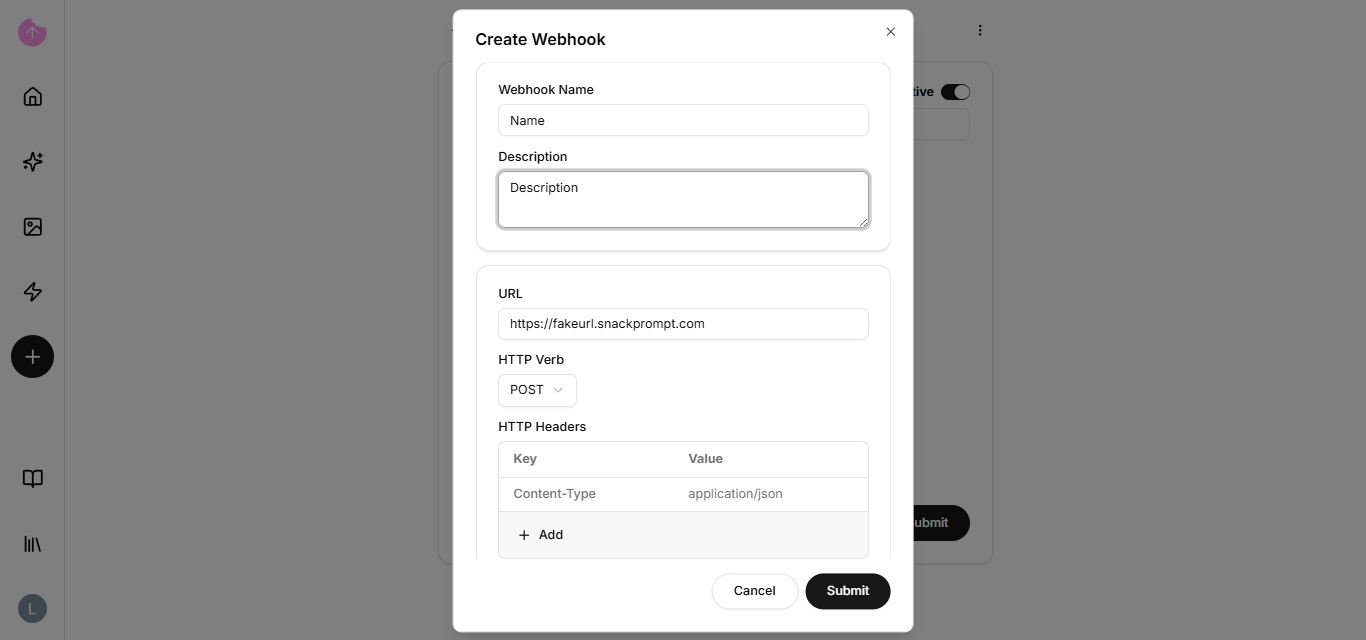
The main point is the URL; you need to set one up. You can use Zapier, Make, or n8n. To learn more about creating a webhook URL using n8n, [click here](/bring-your-data-into-ai/how-to/get-started-with-integrations/how-to-integrate-with-n8n.md).
After learning how, you just need to use it in the creation field.
Press the submit button and that's it, you have a complete process.
Now that you know about our webhooks and workflows, let's learn about API Keys!